
Configuring A Switch For Dante
Audio-over-IP with Focusrite's Dante-based products is simple. For the majority of systems, setup will be extremely straightforward. The following guide details exactly what to do with your managed switch when setting up the network. Whether you're new to networking or a seasoned IT professional, the information below will be easy to implement.
What To Look For In A Switch
The Dante network requires the use of at least one Gigabit Ethernet switch. In larger installations multiple switches will be needed. For many networks an unmanaged switc will function without issue, however for the greatest flexibility – particularly as your network grows – we highly recommend the use of a managed switch.
Here are the requirements of any switch to be used with a Dante system:
Switch Examples
Unlike other networked audio systems, Dante works with standard, off-the-shelf Ethernet hardware, which is commonly available and needn't be expensive. There are many switches available with varying features, number of ports and in various sizes. As an example, we have found that the Cisco SG200 and SG300 series switches are ideal for Dante setups.
How To Set Up Your Switch
To set up the managed switch, the following DSCP values should be given the priority shown in the table. Please refer to the user guide of your managed switch for instructions on how to set DSCP packet priority values. This may be under a section called QoS or Quality of Service.
| DSCP Value | Priority | Usage |
| CS7 | High | Time critical PTP events |
| EF | Medium | Audio, PTP |
| CS1 | Low | (reserved) |
| BestEffort | None | Other traffic |
Example Switch Setup:Cisco SG200 Series
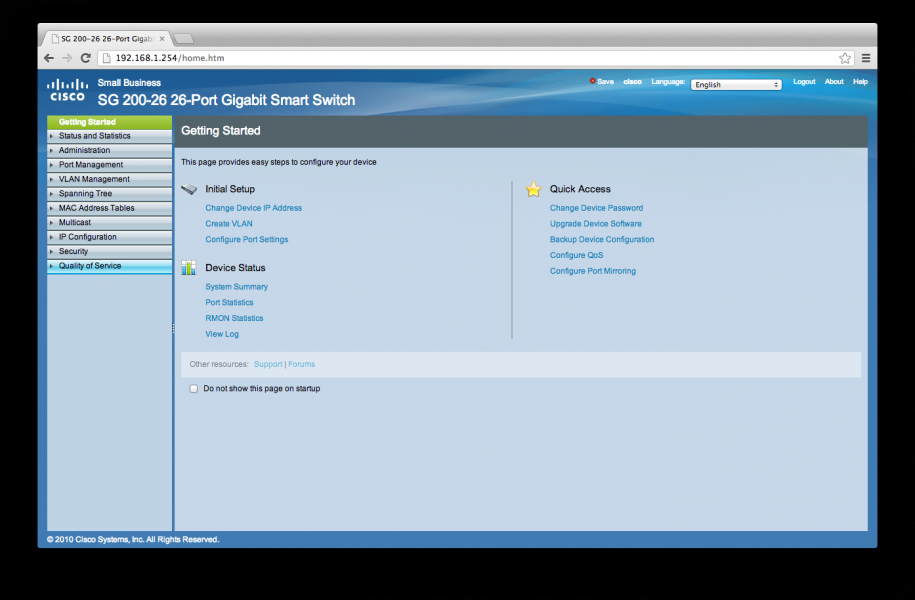
The simplest way to configure a switch is to access it from you web browser. Start your web browser, and enter the IP address of the switch. By default, the address of the switch is set to 192.168.1.1.254, and the username and password are both "cisco".
You should set the IP address of the computer beforehand to 192.168.1 x (for example: 192.168.1.100) and set the subnet mask to 255.255.255.0
For PC:
Let's go into the network setting of the computer's IP address.
Control Panel > Network Adaptors
Select properties
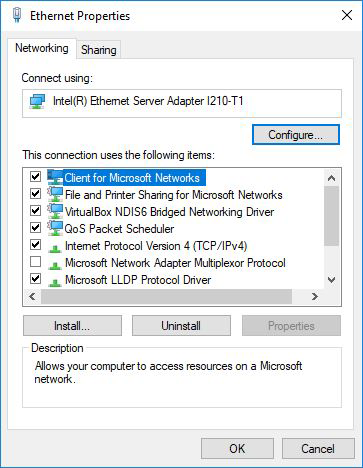
Go To "Internet protocol Version 4"
You should set the IP address of the computer beforehand to 192.168.1.x (for example: 192.168.1.100) and set the subnet mask to 255.255.255.0

Start your web browser, and enter the IP address of the switch. By default, the address of the switch is set to 192.168.1.254, and the username and password are both "cisco".
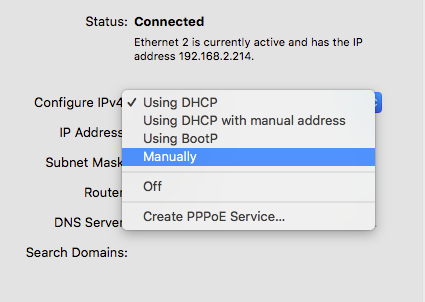
For Mac:
Go to System Preferences > Network.
On left side go to the Ethernet port and set the "Configure IPv4 to Manually
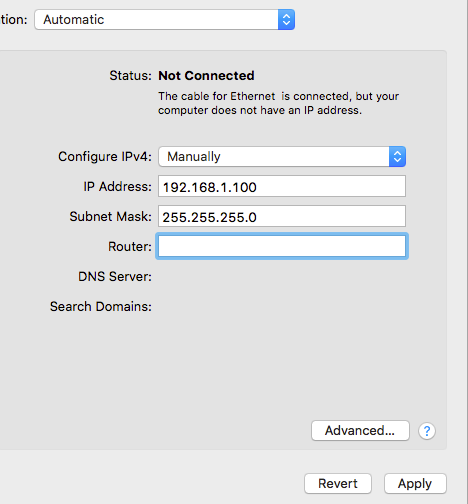
You should set the IP address beforehand to 192.168.1.x (for example: 192.168.1.100) and set the subnet mask to 255.255.255.0
Start your web browser, and enter the IP address of the switch. By default, the address of the switch is set to 192.168.1.254, and the username and password are both "cisco".
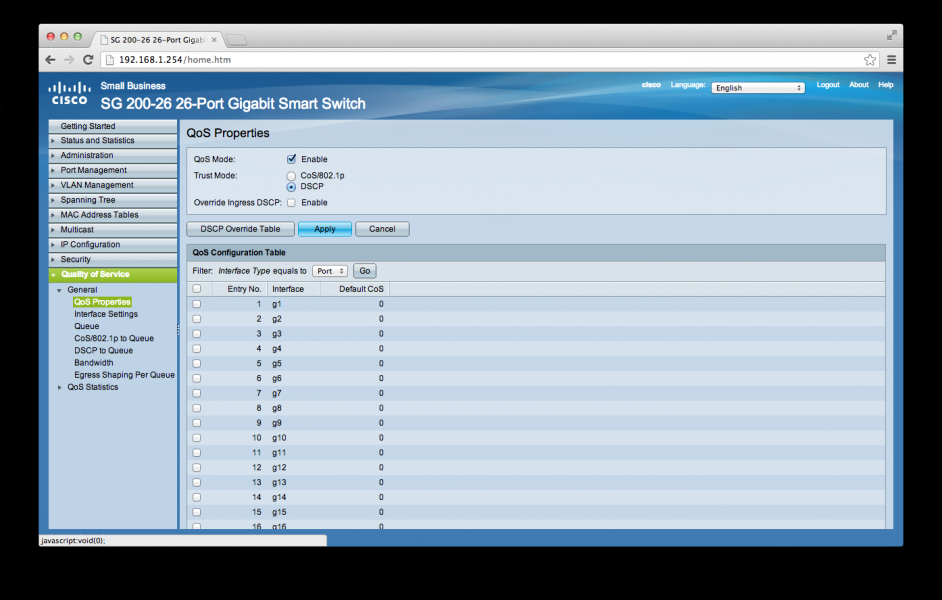
On the left hand side, click Quality of Service
On the following screen, ensure that QoS is enabled and that Trust Mode is set to DSCP
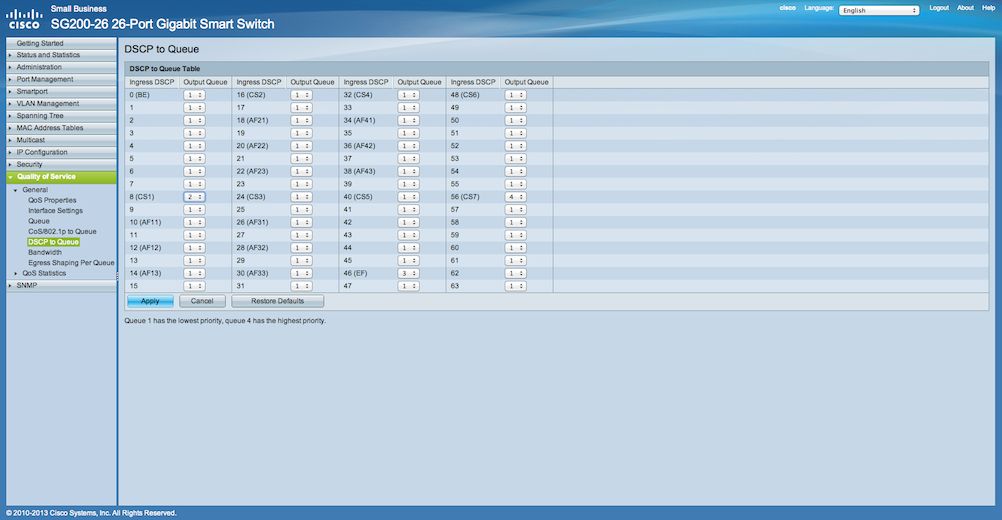
Next, click on DSCP to Queue. Note that this switch uses a scale of 1-4 where 4 is highest priority and 1 is lowest. Here, CS7 (Time critical PTP events) and EF (Audio, PTP) have incorrect priorities

Set the priorities properly by clicking on the drop down menu and selecting the corresponding numbers.
Next, click apply. There is one final step – click save at the top right of the screen and on the following page, ensure that Running Configuration and Startup Configuration are selected. After clicking OK, reboot the switch.
Your switch is now ready to use Dante